Ripped Up Shirt For Halloween: A DIY Guide
Ripped up shirts are a Halloween staple, instantly transforming you into a zombie, survivor, or any other character from your favorite spooky story.
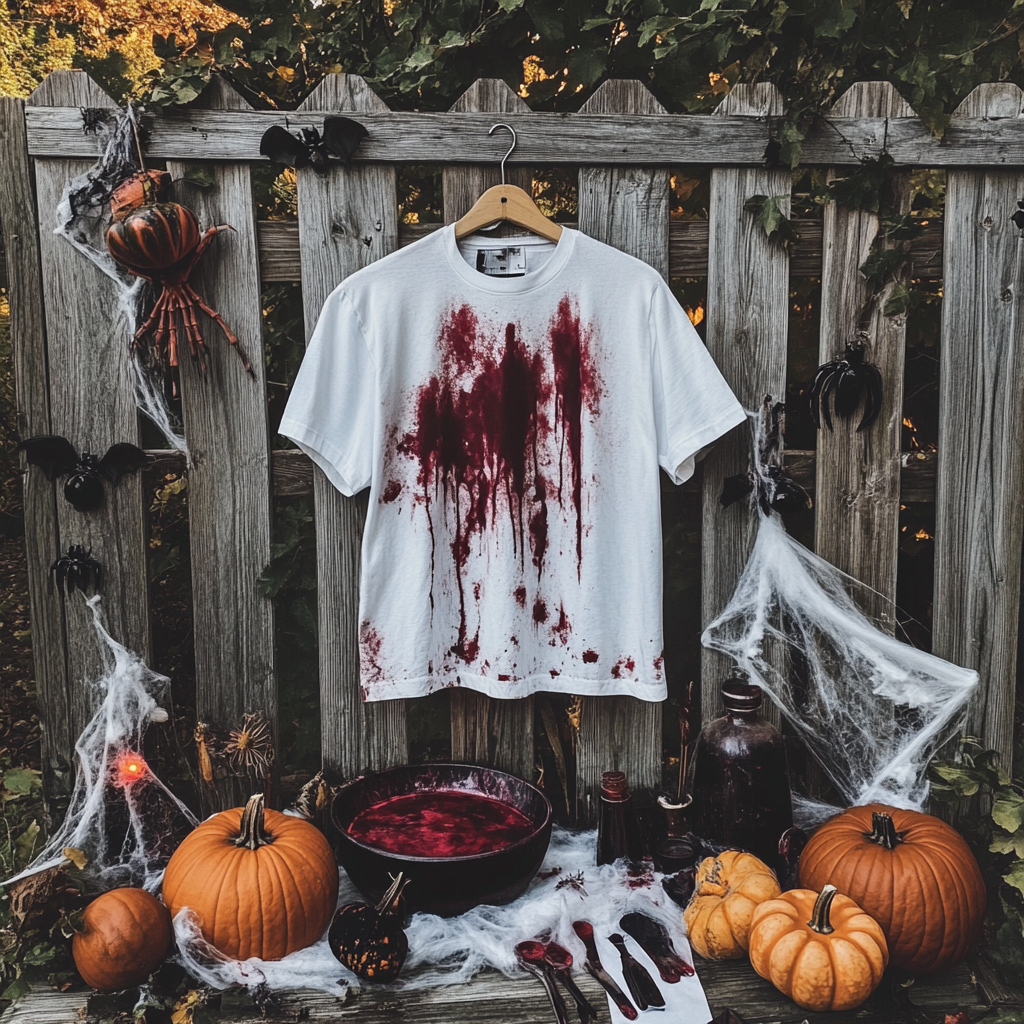
Creating your own distressed and bloodied shirt is surprisingly easy, affordable, and allows for unique customization.
This guide provides step-by-step instructions, tips for achieving the perfect ripped look, and ideas for incorporating your creation into a complete Halloween costume.

1. Gathering Your Supplies: Everything You Need for a Killer Ripped Shirt
Before you begin your transformation into a Halloween icon, gather these essential items:
- A plain white T-shirt: The foundation of your masterpiece. Opt for a slightly oversized shirt for a more dramatic effect.
- Scissors: Sharp fabric scissors will make clean cuts and prevent fraying.
- Tweezers: Essential for creating that perfectly distressed, frayed look.
- Bowl and spoon: For mixing your "blood" concoction.
- Water: The base of your realistic blood effect.
- Cocoa powder: Adds depth and richness to the blood color.
- Red food coloring: The key to achieving a vibrant, gory hue.
2. Ripping and Distressing Your Shirt: From Pristine to Post-Apocalyptic
Now for the fun part – transforming a plain white tee into a tattered garment worthy of the undead.
- Strategic Cuts: Begin by cutting along the seams at the bottom hem and the collar of the shirt. This instantly creates a worn, weathered appearance. Next, create slits of varying lengths and widths across the shirt, mimicking tears and rips. Consider the placement of the rips to enhance the overall effect – for example, concentrate rips around the chest and sleeves for a zombie look, or create larger tears along the shoulders and back for a survivor aesthetic.
- Distressing with Tweezers: Once you’ve made your cuts, use tweezers to pull at the edges of the fabric. This will create a frayed, unravelled look, adding to the realism of your ripped shirt. The more you pull and tease the fabric, the more distressed it will become. Experiment with different levels of fraying to achieve the desired effect.

3. Creating the "Blood" Effect: A Recipe for Realistic Gore
No ripped Halloween shirt is complete without a touch of gruesome realism. Here's how to create a convincing blood effect:
- Mixing the Concoction: In a bowl, combine about a cup of water with a teaspoon of cocoa powder. Stir until the cocoa powder is completely dissolved. This will give your "blood" a more realistic depth and texture.
- Adding the Color: Add red food coloring, a few drops at a time, until you achieve the desired shade of blood. Start with six drops and adjust as needed. For a fresher, brighter blood effect, use less cocoa powder and more red food coloring. For a darker, dried blood look, increase the cocoa powder and use less red food coloring.
4. Applying the "Blood": Techniques for a Gory Masterpiece
With your "blood" mixture ready, it's time to add the finishing touches to your ripped shirt.
- Dipping and Flicking: Dip your fingers in the "blood" and apply it around the edges of your rips and tears. This creates a realistic look of blood seeping from the wounds. For a more dynamic effect, try flicking the "blood" onto the shirt using your fingers or a paintbrush. This technique will create splatters and droplets, adding to the overall gore factor.
- Soaking and Staining: For a more saturated blood effect, consider soaking sections of the shirt in the mixture. This will create darker, more intense stains. Be sure to wring out any excess liquid before hanging the shirt to dry.

5. Styling Your Ripped Shirt: From Zombies to Survivors and Beyond
A ripped shirt is a versatile Halloween costume foundation. Here are a few ideas to inspire your creativity:
- The Classic Zombie: Pair your bloodied, ripped shirt with tattered jeans, ripped tights, or leggings. Add some zombie makeup and a shuffling gait, and you're ready to roam the streets in search of brains.
- The Apocalypse Survivor: A ripped shirt is the perfect base for a post-apocalyptic survivor costume. Combine it with cargo pants, boots, and a few strategically placed accessories like a bandana or a utility belt. Add some dirt and grime to your face and body for an extra touch of realism.
- The Ghostly Spirit: A white ripped shirt can also be used to create a ghostly apparition costume. Pair it with white pants or a skirt and add some ethereal makeup. Consider draping chains or other accessories for a more dramatic effect.
- The Victim: A ripped and bloodied shirt is ideal for portraying a victim in a horror scenario. Combine it with jeans or a skirt and add some realistic wound makeup.
6. Ripped Shirt Inspiration: Explore the Possibilities on Melywear
Looking for more Halloween costume inspiration? Visit Melywear for a curated selection of fashion trends, DIY ideas, and gift suggestions.
Discover unique ways to style your ripped shirt and explore other Halloween costume possibilities. Melywear offers a wide range of articles and resources to help you create the perfect look for any occasion.

FAQ: Your Ripped Shirt Questions Answered
- What type of shirt is best for ripping? A cotton t-shirt is generally the easiest to work with and provides the best results.
- How can I prevent the rips from getting bigger? Once you've achieved the desired level of ripping, you can reinforce the edges with a small amount of fabric glue or by stitching them discreetly.
- What other materials can I use for a blood effect? If you don't have cocoa powder and red food coloring, you can use pre-made fake blood or create your own using corn syrup and food coloring.
- Can I wash my ripped shirt? Hand washing is recommended to preserve the rips and blood effects. Avoid machine washing and drying, as this can cause further fraying and damage.
Explore more Halloween fashion tips and tricks on Melywear. Discover the latest trends, find inspiration for your next costume, and unlock your inner style icon. Let Melywear be your guide to all things fashion and gift-giving.